
JANUARY DARING BAKERS – TUILES
Time for another Daring Bakers. I wasn’t sure what to expect for this month-would it be a savory recipe, or another detailed cake? I was pleasantly suprised when I saw the challenge-Tuiles. Traditionally, tuiles are thin, crisp almond cookies that are molded over a rolling pin while they are still warm. Once they set up, their shape resembles the curved French roofing tiles after which they are named. There is also a Dutch angle to these-traditionally this batter was used to bake flat round cookies on December 31st, representing the year unfold. On New Years day, the same batter was used, but the shape of the cookie was different-they were shaped as cigars and filled with whipped cream, symbolizing the New Year that was about to roll in. The Dutch sometimes refer to this batter as tulip-paste.
This month’s challenge is brought to us by Karen of Bake My Day and Zorra of 1x umruehren bitte aka Kochtopf. They have chosen Tuiles from The Chocolate Book by Angélique Schmeink and Nougatine and Chocolate Tuiles from Michel Roux.
They chose Tuiles because they thought we all needed something lighter after the holidays. We were instructed to make our tuiles using one of the batter recipes we were given, then shape them either prior to baking, using a stencil, or molding them after baking. We were then to pair them with something light.
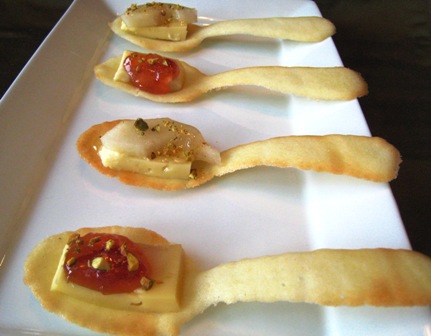
I topped mine with two very simple things-a small slice of Brie and a thin slice of pear drizzled with honey and sprinkled with finely chopped pistachios, or a small slice of Brie and a small dab of blood orange cognac marmalade, again with a sprinkle of pistachios.
The Tuiles were easy to make and had a nice subtle vanilla flavor.
Here’s the recipe I used:
Following is a recipe taken from a book called “The Chocolate Book”, written by female Dutch Master chef Angélique Schmeinck.
Recipe:
Yields: 20 small butterflies/6 large (butterflies are just an example)
Preparation time batter 10 minutes, waiting time 30 minutes, baking time: 5-10 minutes per batch
65 grams / ¼ cup / 2.3 ounces softened butter (not melted but soft)
60 grams / ½ cup / 2.1 ounces sifted confectioner’s sugar
1 sachet vanilla sugar (7 grams or substitute with a dash of vanilla extract)
2 large egg whites (slightly whisked with a fork)
65 grams / 1/2 cup / 2.1/4 ounces sifted all purpose flour
1 table spoon cocoa powder/or food coloring of choice
Butter/spray to grease baking sheet
Oven: 180C / 350F
Using a hand whisk or a stand mixer fitted with the paddle (low speed) and cream butter, sugar and vanilla to a paste. Keep stirring while you gradually add the egg whites. Continue to add the flour in small batches and stir to achieve a homogeneous and smooth batter/paste. Be careful to not overmix.
Cover the bowl with plastic wrap and chill in the fridge for at least 30 minutes to firm up. (This batter will keep in the fridge for up to a week, take it out 30 minutes before you plan to use it).
Line a baking sheet with parchment paper or grease with either butter/spray and chill in the fridge for at least 15 minutes. This will help spread the batter more easily if using a stencil/cardboard template such as the butterfly. Press the stencil on the bakingsheet and use an off sided spatula to spread batter. Leave some room in between your shapes. Mix a small part of the batter with the cocoa and a few drops of warm water until evenly colored. Use this colored batter in a paper piping bag and proceed to pipe decorations on the wings and body of the butterfly.
Bake butterflies in a preheated oven (180C/350F) for about 5-10 minutes or until the edges turn golden brown. Immediately release from bakingsheet and proceed to shape/bend the cookies in the desired shape. These cookies have to be shaped when still warm, you might want to bake a small amount at a time or maybe put them in the oven to warm them up again. (Haven’t tried that). Or: place a bakingsheet toward the front of the warm oven, leaving the door half open. The warmth will keep the cookies malleable.
If you don’t want to do stencil shapes, you might want to transfer the batter into a piping bag fitted with a small plain tip. Pipe the desired shapes and bake. Shape immediately after baking using for instance a rolling pin, a broom handle, cups, cones….
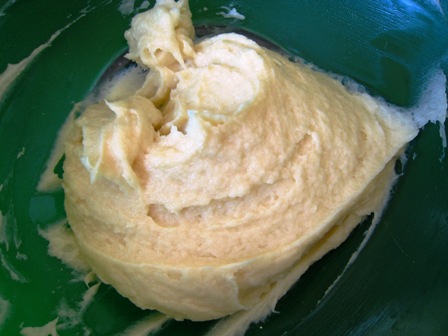
Here is what my batter looked like after it was mixed. It was thicker than I expected, and I did not refrigerate it like called for because I thought it would become too thick to spread:
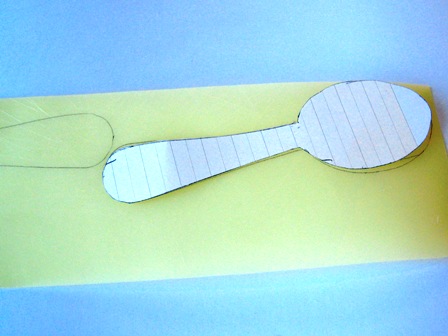
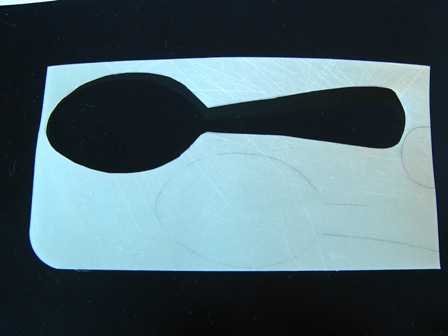
Here are photos of my templates being made:
Simple is good, especially when they are paired with such a fun shaped tuile! Well done!
So very creative. A spoonful of tasty.
WOW! Those are beautiful! What an elegant thing to serve! VERY cool.
I want one now.
Who needs a cheese plate when you can have those? Amazing idea, and beautifully done!
Oohh nice idea making them into spoons!
Nice simple version of the tuile. I think simple is best and your photos are fab.
Great job on your challenge and love the fillings you had created. I too did spoons for some of my tuiles.
Simple and elegant! Great job on this month’s challenge.