
No Knead Bread
Do you love crusty, European- style bread? Are you like me, and don’t have a bakery close by? What about making your own bread? In the past, you had to really plan on when you were going to make it, and if you worked a full-time job during the day, that meant you would only have time to make it on the weekend. Well, things have changed! There are many recipes out there now for no-knead breads, some of them of which you make the batter ahead of time and store in the refrigerator. When you’re ready for a loaf, while your oven is heating up, you pull off a piece of dough, quickly shape it, and let it rest until your oven is heated to the correct temperature.
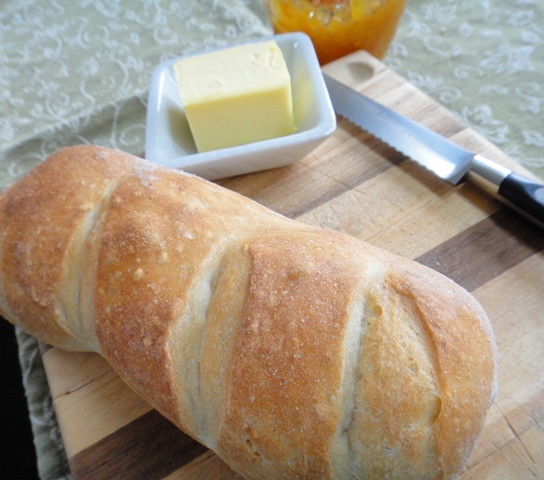
I made my first batch last weekend. I’m totally sold on this method. Saturday morning, I mixed flour, yeast, salt, and water together in my large bucket that I purchased from King Arthur Flour. I let it sit for 2 or 3 hours, and into the refrigerator it went. I was planning on waiting at least a day before making bread, as the dough is supposed to be harder to work with when this fresh. But that evening, I couldn’t wait any more. I reached into that bucket and pulled out a piece of dough, divided it in two, and qently shaped it into baguettes. As my oven heated up, I let it rest. After 20 minutes, my oven was 450 degrees and into the oven I slid them. After about 30 minutes, here is what I had:
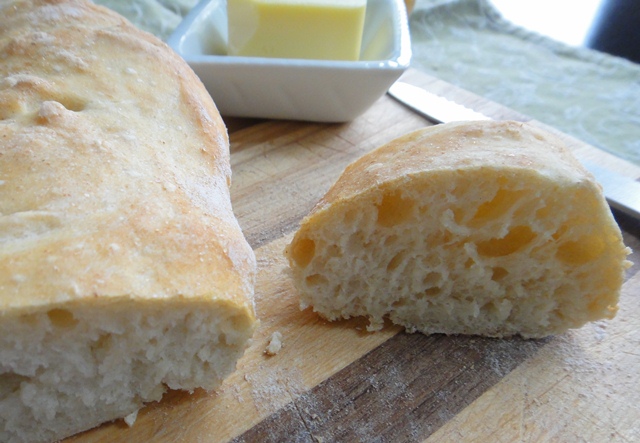
Fresh, warm, crunchy bread. You’re not supposed to cut into it until it has completely cooled, but there was no way I was waiting? Would you be able to?
This recipe/method comes from the book “Artisan Bread in Five Minutes a Day” by Jeff Hertzberg and Zoe Francois. You really should buy this book. Besides containing many different recipes, there’s a lot of explanation as to why this bread works with no kneading.
Basic Dough Recipe Makes four 1-pound loaves
3 cups lukewarm water ( about 100 degrees)
1 1/2 tablespoons granulated yeast
1 1/2 tablespoons kosher salt
6 1/2 cups unbleached all-purpose flour (King Arthur brand works very well)
In a 5-6 qt resealable, lidded ( not airtight) plastic food container, add the yeast and salt to the water. Stir until mostly dissolved. Mix in the flour until the mixture is uniform, without dry spots. DO NOT knead the dough. The dough will be very wet. Cover with the lid and allow to rise at room temperature for 2 hours, or until dough begins to collapse on itself. You can use a portion if the dough anytime after this, but the dough will be easier to work with and have better flavor if you refrigerator overnight. Keeps in the refrigerator 2-3 weeks.
When you’re ready to bake a baguette, preheat the oven to 450 degrees F with a baking stone placed on the middle rack. Place an empty broiler pan or cast iron skillet on any other rack that won’t interfere with the rising bread. Dust the surface of the refrigerated dough with a little flour and cut off a 1-pound piece, about the size of a grapefruit. This will give you one normal size baguette or 2 small ones. Dust the piece of dough with a little more flour and shape it into a ball by stretching the surface of the dough around the bottom on all four sides, rotating the ball 1/4 turn as you go. Once cohesive, begin to stretch and elongate the dough. It might be helpful to roll it back and forth with your hands on a floured surface. Form a cylinder about 2″ in diameter. Cut in half if you want two smaller baguettes. Place the loaves on a piece of parchment that’s been dusted with whole wheat flour and let rest for 20 minutes. After dough has rested, brush the surface of the dough with water. This keeps the knife from sticking as you slash the dough. Slash the loaf with longitudinal cuts across the loaf, using a serrated bread knife. (Be sure and make the slashes very deep. You can see on one of my photos my slashes disappeared when the bread rose.) Slide the parchment onto the stone. Pour 1cup of hot tap water into the broiler pan or skillet and quickly close the oven door. Bake for about 25 minutes, until the loaves are deeply browned. Allow to cool on a rack before cutting or eating.
I know that most of the country is sweltering in heat right now and you probably won’t be turning your oven on for a while. That’s not the case in Alaska this summer. But be sure when your weather turns a little cooler to give this bread a try. I think that you’ll be very happy you did.
This looks delicious! I love to bake, and knead, and knead. Am looking forward to this recipe! Thanks!